It’s that time of year again; Christmas is coming! And it’s time to start preparing your home for all those visitors during the festive season. One of the most time-consuming jobs in preparation for Christmas is cleaning your oven. Cleaning an oven is not a simply task. However, there are numerous steps you can take to make the job easier. Check out our top tips in this article as we explain to you how to clean your oven and keep it clean, for good!
Preparing Your Oven for Cleaning
Before you begin cleaning, it is imperative that you ensure your oven is switched off and cool. Make sure any remaining pieces of food are removed from the oven and that the area is clear for cleaning. We would highly recommend changing into clothes you don’t mind getting covered in grease and dirt because, trust us, this job can get messy!
Top Tip: Always wear rubber gloves when cleaning to avoid contact of chemicals with your skin.
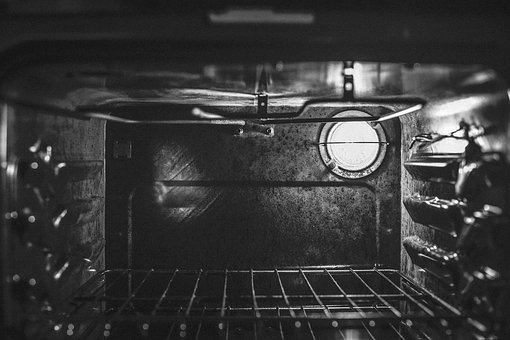
Remove Oven Shelves for Cleaning
Perhaps the hardest part of the oven to clean: the shelves. To help save you on significant scrubbing, we suggest you remove all shelves from the oven at the very start of the cleaning process and allow them to soak in warm, soapy water (laying them in the bath is helpful to allow full submersion). Soaking the shelves will help break down any food that has burnt on to the racks.
Top Tip: For the best results, leave the oven shelves to soak overnight.
Clean Oven Shelves Thoroughly
Once the shelves have been thoroughly soaked, it is time to get scrubbing. Generally speaking, the longer the shelves have been left soaking for the easier they are to clean. Simply spray the shelves down with oven cleaning solution (either shop-bought or homemade) and get scrubbing. With tough to remove stains, we find it helpful to work over the shelves gently with a scourer to help loosen burnt food and scrub the oven racks clean.
If you are short of time and unable to leave your oven racks to soak overnight, there is no need to worry. Simply place the oven shelves into a resealable plastic bag with some generous sprays of oven cleaner, seal the bags and leave to work while you clean the oven.
Top Tip: Always remember to scrub and clean both sides of the oven shelves. Rinse thoroughly with warm water and leave to dry.
Wipe Down the Oven with a Damp Cloth
To begin the oven cleaning process, take a damp cloth and wipe the inside of the oven without using any products. This helps clear out any remaining lose food debris inside the oven. Be sure to repeat this step until your cloth is coming back reasonably clean, rinsing the cloth after each round to avoid spreading dirt.
Spray the Oven with Cleaner
Once you have removed all lose debris and dirt, it is time to get scrubbing. Using either oven cleaner or a homemade vinegar solution, thoroughly spray all internal surfaces of your oven and leave the product to work for 30 minutes (or as long as the product instructions suggest).
Once the product has been given time to work, take your damp cloth and wipe the oven clean. This is a messy step and your cloth may require multiple rinses before it starts coming back clean.
Clean the Corners
The corners of your oven are often overlooked and, as a result, they can harbour significant levels of dust and dirt. Tackle these tricky corners by scrubbing them clean with an old toothbrush. Oven cleaner or bicarbonate of soda will be effective cleaning solutions to work into the corners of your oven – just be sure to wipe away all residue of cleaning products afterwards.
Bicarbonate of Soda
If, once you have completed the above steps, burnt-on food remains in your oven, there is no need to worry. Simply sprinkle bicarbonate of soda onto the charred food and leave it to soften overnight. In the morning you should be able to wipe the stubborn stains away with ease.
Steam Clean Your Oven
To complete the cleaning process, we would recommend steam cleaning. Place a heat-resistant baking dish full of water and half a cup of vinegar into your oven. Turn the oven onto 350° and leave the mixture of water and vinegar to bubble and steam, eliminating any odours and dirt. Allow the steam cleaning to commence for thirty minutes before leaving your oven to cool with the door closed. Once cool, wipe the inside of your oven clean. You will be amazed at how effective a simple steam clean of your oven can be.
Clean the Glass Door
Add the finishing touch to your clean oven by thoroughly cleaning the glass door. Dirty glass can make a space look deceptively unclean and it is no different with your oven. To effectively clean your oven door, use a solution of hot water and oven cleaner to tackle the grease and restore your oven to the shining spectacle it once was.
Top Tip: Do not use caustic-based cleaner on glass as it can cause it to dull.
How to Keep Your Oven Clean
So, now that you know our top tips for cleaning your oven so well that it looks as good as new, how do you keep it that way? Below are some of the clever tips and tricks we have learnt over the years:
- Place a layer of tin foil at the bottom of your oven to catch any food that may fall. When it comes time to clean, simply replace the foil – it couldn’t be simpler!
- Regularly soak oven shelves or place them in the dishwasher to keep clean and avoid any build-up of burnt food.
- Once you have finished cooking your Christmas roast, place a heat-resistant bowl of water inside the oven and heat for 30 minutes. Once fully cooled, wipe down your oven with a damp cloth to remove any dirt and avoid grease build-up.
Call Why Bother Cleaning Today
If the Christmas festivities are sneaking up on you too quickly and you have countless things to do already, give us a call today. The team at Why Bother Cleaning are here for you and will clean your oven to extremely high standards, giving you one less thing to worry about. So, what are you waiting for? Give us a call today and let us do the hard work for you.
Leave a Comment
Are there any great oven cleaning tips we haven’t mentioned in this article? We would love to hear your top tips, so why not leave us a comment below? We hope you have found this article useful. Feel free to browse our blog for more cleaning advice from the experts.